Sunday, August 29, 2010

Baby Boy Gift Set

This was a little gift set I made for a friend. I made here a total of four little gifts. She went with me to get the fabric and this is what I came up with. I hope the baby enjoys it. I made what my kids like to refer to as a lovey. I patched the different pieces of material together and used brown minky fabric on the back.
I also made two burb clothes. Here is one. They were super simple and easy to make. I then added a ribbon on each side for a little extra.


Here are some shots of the finished project. It was a great easy quilt like blanket. I love the way it was a little thicker and bigger than a normal blanket.

The Girl Creative


Sumo Sweet StuffKeeping It Simple

Wednesday, March 3, 2010

CINNAMON TOAST WEDNESDAY TASTE


Today here is a simple quick breakfast or snack idea. My little ones love this treat. It was also a treat that I used to get when I was little and at my grandmas house. I'm sure many of you have had something similar.


INGREDIENTS:
*Bread
*Butter
*Sugar
*Cinnamon
Get a piece of bread and spread some butter on top of it. Then put some sugar and cinnamon on top of the butter. Place in the oven to toast and that is it.

Monday, March 1, 2010

SIMPLE CURTAINS. MAKE IT MONDAY


My little girl is the child that as soon as the sun comes up says, "Mom time to get up the sun is up." You can imagine how much fun this is when it is 6 in the morning. She also has her bedroom in the basement of the house. As a result her room is really cold in the winter. I wanted something to keep out the light and keep in the heat. I found black out liner at JoAnns and the fabric I wanted to use at IKEA. I love IKEA. I waited until they were both on sale to but the fabric.


As for the curtain I did not want the typical curtain that hangs on the outside. My children are monkeys and I was worried that they would pull it off. I also did not want a roman shade because of the safety issue. So instead we found this great thing at IKEA. You can configure it however you want use as many panels as you need. This worked out great for our window. We used three panels and they slide side to side.


The sewing was very simple. I cut the two pieces of fabric to fit in the window. I then folded the outside layer over the liner and sewed with a straight stitch. That simple.

Friday, February 26, 2010

FRIDAY STYLES


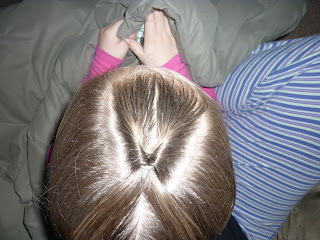
Today's style is what my little one refers to as a flippy. When I was little we had a little tool called a topsy tail. Either way it is simple easy quick style. It is even a dad friendly style. This particular day we did a flippy with two braids at the bottom. They were basic braids started at the base of the scalp. Sorry I do not have pictures yet. We had a rough night with my 2 year old and I wasn't able to post pictures before work. When I get home this evening they will go up. Have a great day.

Wednesday, February 24, 2010

Wednesday Taste Fajitas

Fajitas are a favorite in our house. We use chicken or beef and if we are feeling special we use both. You can use whatever you like best. This is what it looks like when it is all in the pan ready to cook. It is simple and everyone can add whatever they want to it.


INGREDIENTS:
*Chicken or beef
*Red and Green Bell Pepper
*Onion
*Italian Dressing( I use fat Free)
*Worchestire
*All Purpose Seasoning(Tex Joy)

First cut all your veggies. You can make them as big or little as yo want. Then cut your meat. Place everything in a pan together. Once it is all in the pan I pour Italian dressing over the top. Once again there is no exact measurement. It is enough to cover the food and have some on the bottom of the pan. Add Worchestire and Seasoning to your taste. Then turn on the stove and cook. You will have top stir the food throughout the proses. The fajitas are finished when there is no dressing left in the pan and the chicken or beef is cooked. Add to your tortilla and top with whatever you like. Enjoy. This is the finished product.

Monday, February 22, 2010

Make It Monday Headband

I have been looking for a headband everywhere. However I have not been able to find one that is just right. So I decided to make my own. I went to target and bought a pair of infant tights. I then cut the leg out. Once the leg was cut I folded the edge over and hot glued it together. you then will need to take the two ends and glue them to together to form a circle. Make sure to measure it on your child's head before you glue it. This was so simple and inexpensive. I was able to make a white, pink, and an opaque headband. These are now my little ones favorite.


This is the fabric flower that I made to add to the headband. It was fairly simple to make. I loved the way it turned out. I also like that you can decide how big to make the flower. I found the tutorial at http://maizehutton.blogspot.com/2007/08/frayed-flower.html. I hope that you find this tutorial as helpful as I did.


This is the finished product. I love it and so does my little one. She loves that we can take the flower fabric off and add any of her bows to it.


I'm linking up at:
My Frugal Familyhttp://theherberfamily.blogspot.com/2010/01/love-banner.html


ASPTL

Saturday, February 20, 2010

I have my first feature. Thanks to the girl creative. Make sure to check her out. She has lots of fabulous ideas. The Girl Creative